Showing posts with label Boys Room. Show all posts

Monday, October 21, 2013

Two Roads diverged in a wood...

Some exciting news around my house is that some friends are having their first baby.  And while it is much too early to share their fantastic news..I was feeling inspired.  I'm so excited to have this new little baby in our life.  I cried when I was told and I've cried more than once since.

I picked a camping theme which I think fits my favorite outdoorsy couple...I loved doing this little boys nursery so much...and since we don't know the gender why not do a girl version (a lot more challenging for me)...check back tomorrow for that one!
Here are the basics:

I love the green touches, but I think orange would have looked really good too.  I think any bold fun colors would look great as accents...yellow and red would be my choice.

I also love finding things for the walls:  I'm a big fan of gallery walls even though the execution of hanging each piece is terrifying!  Here are babys walls:
Most items are from Etsy!
Yes, I would put the gallery wall over the crib and I did it my own home.  Not everything has to be glass and heavy (those are felt arrows!)!  A few extra nails and screws and you should be safe.  The Chicago print is not the actual city I would use for this couple, but I didn't want to use their real city..which is available in these great colors!  Those field guides were my favorite.

On the changing table (& dresser in one!) wall shelves I would probably put some old tins to hold q tips and diaper cream and some fun family pics.  I couldn't resist adding an animal head, plus I think it is tall enough to balance out the height of the shelves beside it.

Every room needs a bookshelf and I would not only include books about Tom Sawyer, Huck Finn and Swiss Family Robinson, some more family pics (mom is quite the photographer), but also an iPod dock...I know, so 2014...but the iPod can play lullabies or white noise..but let's face it, with a newborn it's nice to know how often you are feeding that ferocious little bear with a clock (I know some people disagree).  I like this one from Houzz.  Kind of retro
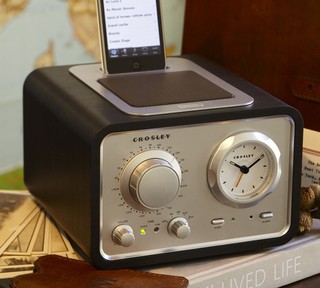
Or this one that looks like a tree stump
From Shirwood Creations on Etsy
And since I'm a clothing girl, I couldn't resist hanging a few pieces in his virtual closet....

My friends did not give me any direction it was purely what I thought of when I thought of their baby.  That being said, this little nursery will more than likely not have any finished project pics, but whatever they choose will be fantastic I know!

Tuesday, January 24, 2012

Boys Curtain Link Up!

Today I am linking up with Beth over at Home Stories A 2 Z.

I know everyone has seen these curtains over on Pinterest but there is no tutorial or information on how to get them done.
The Pinterest version
There isn't much to share, except a few pieces ( heavy anchors and the rod is electrical not plumbing, like the rest of the pieces!)

Here was my original post!
I would love to see some other takes on these cool rods!

Thursday, January 12, 2012

Curtains!

The boys curtains went up, which seems like it took forever. However, it took me much longer to write this post! I shared the inspiration in this first post about their room.

First I knew I wanted white curtains. Then I found these:
Source via Pinterest
I have been using navy as an accent so I knew I wanted to use navy at the bottom and not red. And they would be hanging on a red wall. Curtains are from World Market. Found some navy fabric at JoAnns Fabric and my seamstress amazing mother, measured, cut and hemmed them!

Then I found this curtain rod
Source
So creative! Kind of nautical. Seemed so easy! Easy until I went to execute the design. Aunt Kelly and I went to Lowes to pick up all our plumbing supplies. Since we didn't have any directions, we were going off the picture and the grommet holes on the curtains. Things were going well until we picked up the rod itself. It weighed at least 10lbs (for the length of 2). We went and looked at anchors. Big, strong, massive wall anchors that were going to be strong enough to hold a four and two year old swinging on them! Then we asked an associate where the wall anchors were if there was another solution for the rod. He suggested electrical conduit. This was great because the rod was lighter and CHEAPER!! Woot!

And then we went to put them up. One of the elbows was missing some thread. Ugh....I have two small children and I was pregnant and now I was having to go back to Lowes at Christmas.....Ahhhhhh!! But I was so excited about these curtains and how they would look! I will say that hanging them was a lot more work than regular rods (heavier and they have to be done at once, not a braket at a time), they were about $30 for each window (about the same as a regular curtain rod) and curtains can not be washed as easily. You will have to take off the rod itself, unless you got curtains that tie. But I was worried that would not fit my look! Thanks to the hubs and his muscles for the hanging part of this project!

I think they look awesome, if I do say so myself!
Soon I'll get some shelves up and a final room reveal!! I know, I know, you can't wait! Believe me, I can't wait to have it done!

Other Boys room projects:
Inspiration
Nautical Flags
Artwork
A Dresser
A Dresser Reveal

Tuesday, January 10, 2012

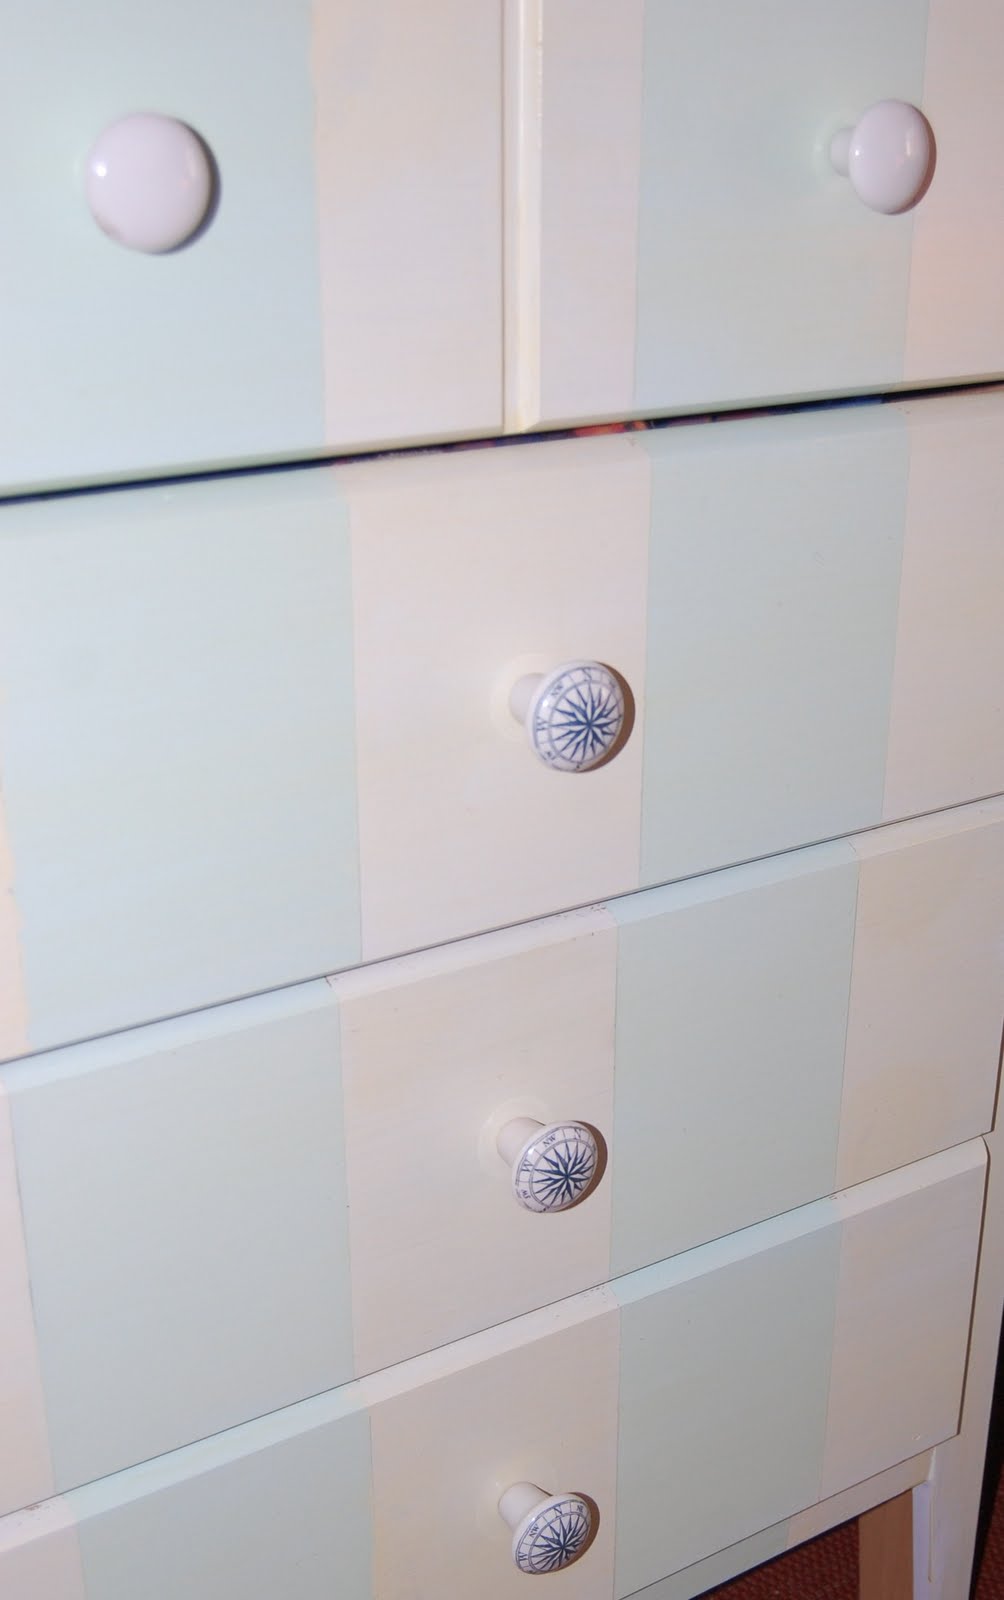
Nautical Dresser

Remember this post.
Well, I finally finished it, filled it up, and there it sat. Waiting for this post.
I didn't sand it and I should have. Normally I would have, but for it's purpose, I didn't see the need. But I did prime it, taped out my stripes and got to work.
I really liked the rope knobs on the inspiration piece and wasn't sure if they were going to be "too much". Now, I wish I could have found them. I think I would have really liked them. Instead I found some other ones, but was still afraid they were going to be "too much", so I went with the bottom three drawers. Thinking now I would like to find some more for the top two drawers!!
B has been enjoying his "new dresser" and his big brother is happy he no longer has to share a dresser. Why do they care? They are 4 & 2 and they are boys!!

It wasn't my best redo, but I like it and I haven't heard the boys critique it...yet. I couldn't decide if I wanted to distress it or not? Time was running out. Little Miss was on her way and I needed to get her room done too! Maybe one day, I'll distress it?!

If I could just get two shelfs up in their room, it would be ready for a reveal. I have them, they just need to go up. Maybe one day, I'll get those up, but for now I just seem to be adding to the ole to do list!

Tuesday, November 15, 2011

Another link party!

I love reading what Beth has to say or post over at Home Stories A 2 Z. She has some great ideas of her own and commonly does a Tips & Tutorials link party. I've never participated, because of timing, but mostly because I feel we all have a lot of the same things to post.

However, I love the boys nautical flags that I wrote about hereso much that today I had to share them! So I linked up and shared with the world. For some reason this is kind of scary. Opening yourself up to all the comments. Of course, it is just decorating, what can one say...

Make sure you stop by and see some other great links!!

Tuesday, November 8, 2011

Dresser Redo

I have this dresser that I want to use in Bs room. It's a cheapy Target one that is perfect for two reasons. One, I have boys (who will probably climb, color, and somehow destroy)!

Two, it's perfect to paint. Believe it or not, I really do have a problem painting furniture wood furniture. That makes this a win win. It's cheap and not real wood. If the boys tire of it or the nautical theme it can be repainted or listed with Craig. It's not real wood, so I don't feel guilty if it doesn't work out or I want to change it in the future.

I searched Pinterest for some inspiration. It seems to be my first go to these days. However, it turned up very little. So I did Google images and voila. My favorite is this one (which I then pinned to Pinterest, so now it's out there):

Found here at House To Your Home
It's pretty identical to what I had in mind.

I Love the knobs she used. Anthropologie, go figure!! You know I am a sucker for their hardware. Again, pretty identical to what I had in mind, but I think it might be too much "nautical" with all the other items in the room.

I might spray them with some oil rubbed bronze and see how that goes. There is always white? If those fail, I can splurge on the knobs or make something similar.

Hopefully it won't take as long as those curtains are..I'm hoping while grandma is here she is willing to work on those..Ma-ma can you heeeaaaar meee?! Just a small hint.

Here's the previous post on the boys room here and here and here

Wednesday, November 2, 2011

Pinterest Challenge

I did it. I participated in the Pinterest Challenge. Well, we'll see anyway. I tried to and Sherry at YHL made the directions sound super simple?! You know I love some Young House Love, I blogged about them here. Now we are practically neighbors..Well the same zip code anyway.

I didn't participate last time because, I wasn't ready to share any of the projects I'd already done and I hadn't blogged about them either, which made it a more than two step process to get it done....so it didn't.

I just checked...IT WORKED. I linked up! I'm number 338!

And since that was so easy I linked up over at Bower Power. I'm number 173!!! Love me some Katie Bower. I think she may have gotten that old window over the big fixed window because you don't really want blinds idea from me? No? Yeah me either, especially since I didn't blog about it!

So then I participated with Erin at House of Ernest. Number 133!! Erin was participating with YHL & Bower Power but her blog is a fave too!

But the kicker..I linked up over at Ana White. Number 90!! I may not be featured but Ana White is my idol. Not only is she creative, she builds things too! AFTER she makes & creates a plan for it!!

Sooooo, what did I link to these amazing bloggers my idols & fellow DIYers? Well my latest Weekend Wrap Up art project of course!

Tuesday, November 1, 2011

Weekend Wrap Up

EDIT!! Today (Wednesday) I linked up to the Pinterest Challenge with YHL, Bower Power, Erin at House of Ernest, AND Ana White!!
***************************************************************************************
In this post, I showed you some inspiration artwork for the boys room.
These cute prints both from A Vintage Poster and this one
too.

Even though we didn't get much else done in the room (we were a little busy with a visit from Aunt Kelly and Halloween and a head cold for me), we did get some nice and cheap artwork completed.

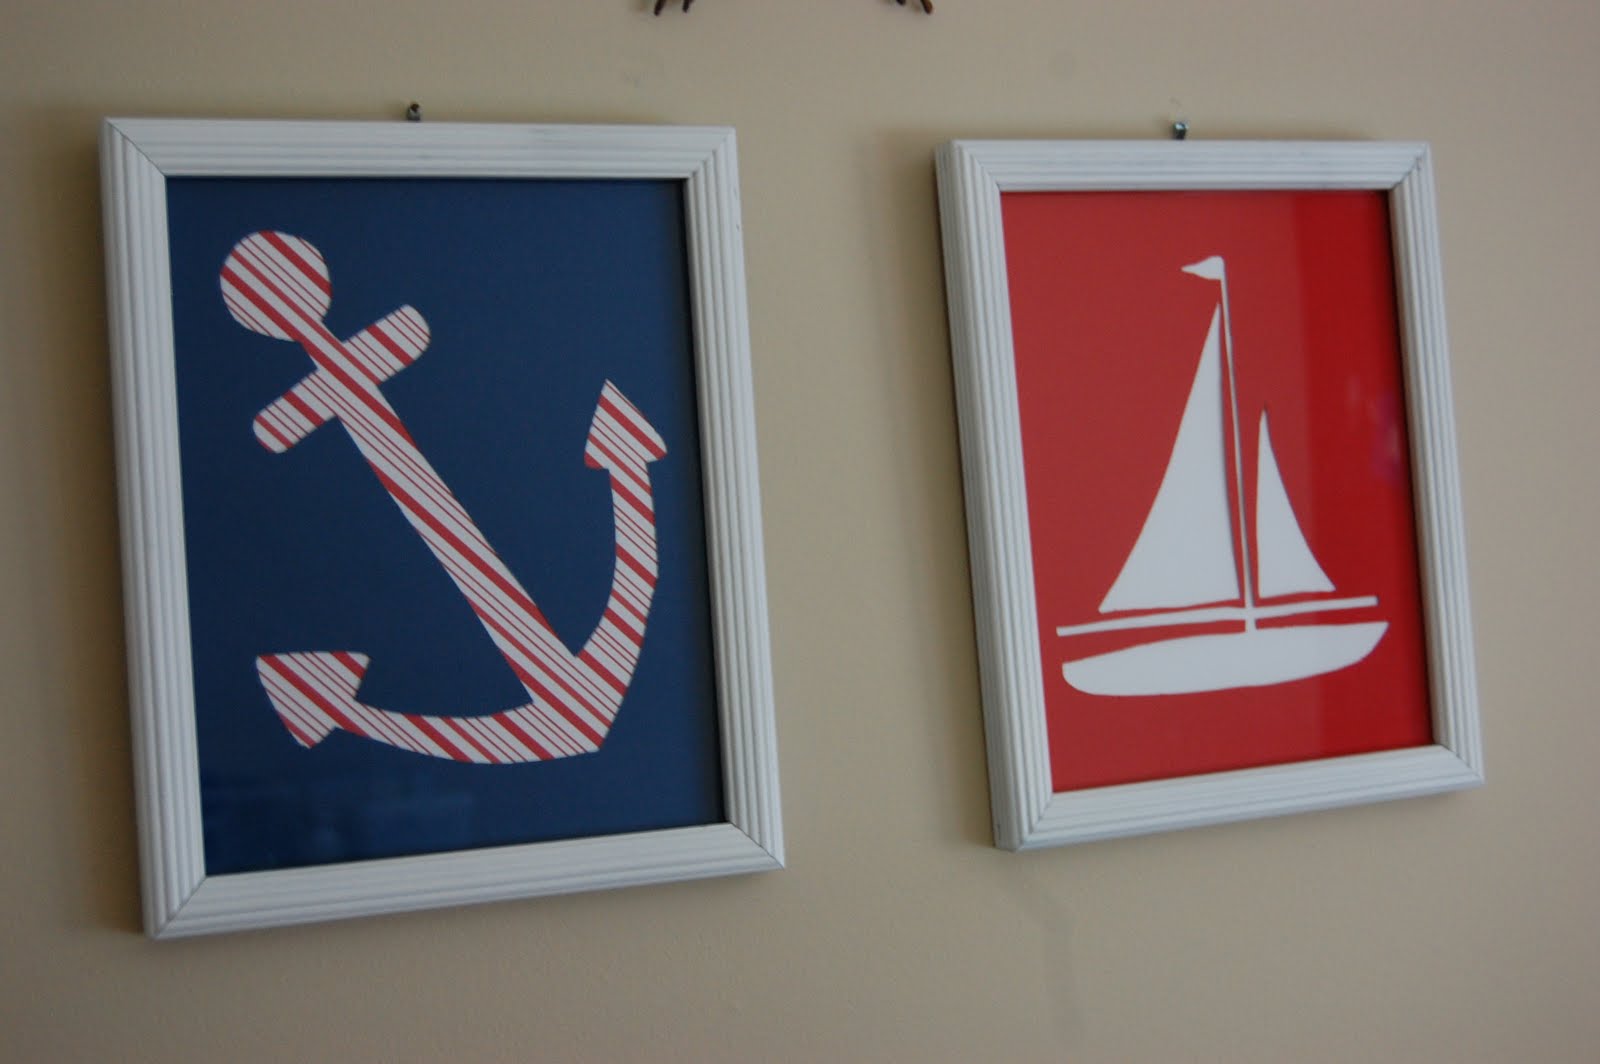
We started with these beauties from the goodwill.


I bought paper from Michaels using my three main colors (red, white, & blue). I found some images on line and picked my favorite two and printed them out (fit to paper) and printed.
This is where & why, I should insert step by step instructions and pictures:
I rubbed a pencil over the back of the images.
Taped them to the colored paper (the solid red sheet and the solid blue sheet). I traced the images (on the printout) which transfered the image to the solid paper.
I then retraced the image on the solid paper with a darker pen and covered with clear packing tape (so the paper was that much stronger) and then cut the image out with an exacto knife.
We painted the frames white.

And....

The lines aren't as crisp as a print and if I was really good at print/photoshop, I probably could have created my own print. But I like the texture of the paper and the mat effect of the layers.

Oh and I really like the price (not that the $28 for two prints was bad)...
Two frames from goodwill......$4
White spray paint.............had on hand (as well as packing tape and exacto knife
4 pcs of paper from Michaels..$1

I promise the curtains are coming!! You know the ones from the above post, that I thought we would get to with Aunt Kelly here. Opps!

Here's the progress on the boys room here and here

Thursday, October 27, 2011

A sailing we will go

I found some inspiration on Pinterest (shocker!) which was originally from Apartment Therapy (a great & fun source!)


I wanted flags but I wasn't sure what I was going to do with them. I did find them online at $20 each. I needed 6. ($120ish) It just seemed like a lot of money for some flags, that soon the boys would grow tired of?

So you know me, I set out to make my own. I found the boys initials on line yeah google, got some paint (3 colors for .50 each) & canvases from Michaels, with coups of course ($7/each). I still wasn't sure how to hang them. But then the light bulb went off and I went to Lowes to get rope that looked like sailing rope ($5ish) and cleats ($1.50/each).

I taped out the canvases with painters tape (after measuring, of course!)and then Q painted them. I then drilled holes on two sides of each canvas, strung the rope through, tied some knots, cut the rope, burned the edges and hung them up. I wish it was that easy. I didn't have a bit the size of the rope so it took a wee bit longer than I had anticipated or hoped. But I was anxious and didn't feel like heading back out for a bit. And, I am sure B was sleeping.

The boys room is far from finished, but we have a helper special visitor coming this weekend who I am sure is going to want to help finish it up?!

So without further a do....
BPP

CQP

I have to admit, I'm pretty impressed with my cleat idea, it's my favorite so far!

The (not so finished) wall

$120ish vs $54 (and some change) (Thanks to painters tape on hand. However, if you weren't letting your 4 year old paint them, you wouldn't need the tape, just a ruler and a pencil!)

Next up, more art work, curtains (and their very cool rods)a new bed for the little guy (that needs to be purchased), and a dresser (that needs some painting). Yup, we are a little busy over here!

You can find more boy's room deets in this post

And now you can see I linked up with Beth over at A 2 Zbecause I couldn't resist not sharing this easy, fun & colorful project!

Monday, October 17, 2011

Seeing Red

One of the few projects we have started here at Chez Phillips' is the boys room. Q wanted a red room. We compromised on a red wall. Or maybe I just decided we weren't going to have a red room, that I would compromise on a wall. He's too young and I am sure his taste will change fiercely over the years. However, I do feel like red can grow with him.

I wasn't sure what to do with red. They have a cowboy room at their grandparents. If I had been better at blogging all summer you would have seen it. So this time we, (coughcough) I, went nautical. Why wouldn't I? I am from the beach. I could have done sports, but there is plenty of time for sports & team themes. Plus this red will work GREAT when it's time for a Red Sox room!

Here are our red test spots

There are only two colors to choose from and it's only going on this wall, but still wanted it in a few spots to see how light would hit it.

The bottom one is the choosen one. Valspars Radiant Red from Lowes. Red. Definately red. Went on nice and smooth and thick. The quart size already has primer in it! Woot Woot! The red above it is from Home Depot and went on great but is really thin. EXTREMELY thin. Would take several coats. The Valspar will need two coats, but I find most do. That could just be me, being paranoid about empty spots!

Here are some inspiration shots that you can expect to see in the room.
This was my starting point. I LOVE the navy & white comforters. But the charts. Oh those charts. If they weren't so expensive and would come down easily. I did search and search for the comforters or covers, only to find them for $180. Don't think so. Even thought about making them, until I found something just as good at Target.

VIA

These curtains (with navy bottoms instead of red)

VIA

On these curtain rods (that we will be making when Aunt Kelly comes)

VIA

And two pieces of artwork to fancy up those walls!


Both prints from HERE But you know, I'm going to try and do them somehow myself. Which means you also probably won't be surprised when I tell you, I bought the paper to recreate them today.

The rest of the details will have to be a surprise!